HOME » BLOG » WEEKLY WALL PLANNER – SHOW AND TELL PLUS BUILD INSTRUCTIONS
WEEKLY WALL PLANNER – SHOW AND TELL PLUS BUILD INSTRUCTIONS
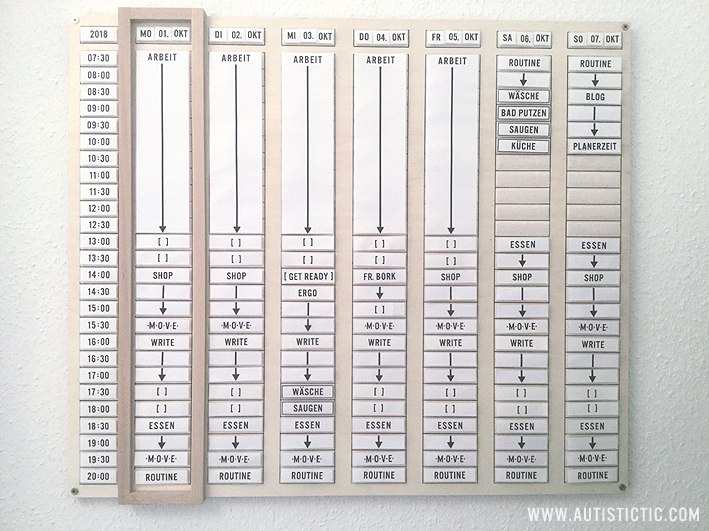 I just finished a rather big project and thought I would share it with you. I use a large handmade weekly wall planner to help with my Executive Dysfunction, as well as my memory issues. Maybe this is helpful for others.
My planner is 74.5 cm wide, 63.5 cm high, and 6 mm thick. Each label for tasks is 7 cm wide and 2 cm high.
Horizontally in the top row, I have the current year, then the names, days, and months of the current weekdays. This is necessary because due to my memory issues I usually cannot remember the current date, often forget what day it is, and sometimes even forget the current year.
Vertically in the first column, I have the time divided into half-hour increments. This is necessary because I often have half-hour appointments and tasks.
In the vertical columns, I have all tasks and appointments for each weekday. This is necessary because I need to plan everything I want to do. Otherwise, I will not remember to do it. And I will often get stuck trying to decide what to do.
WOODEN SLIDING FRAME TO MARK THE CURRENT DAY
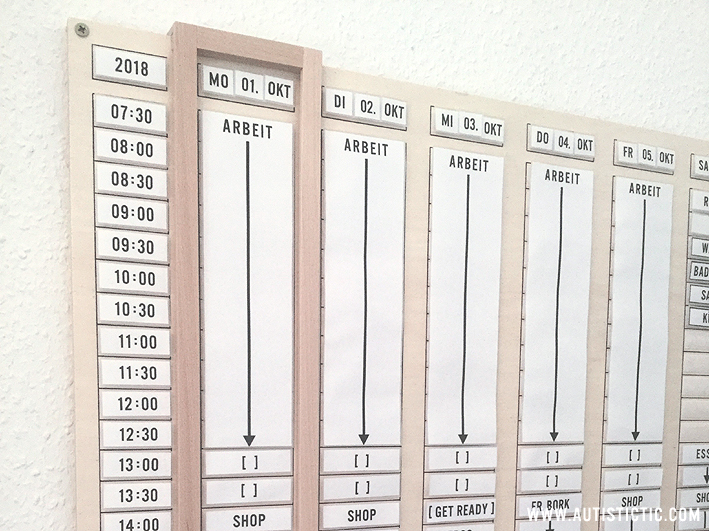 The sliding frame allows me to find my appointments at a glance. This way I can check them from anywhere in the room without having to walk over to the planner.
VELCRO ON EVERY FIELD
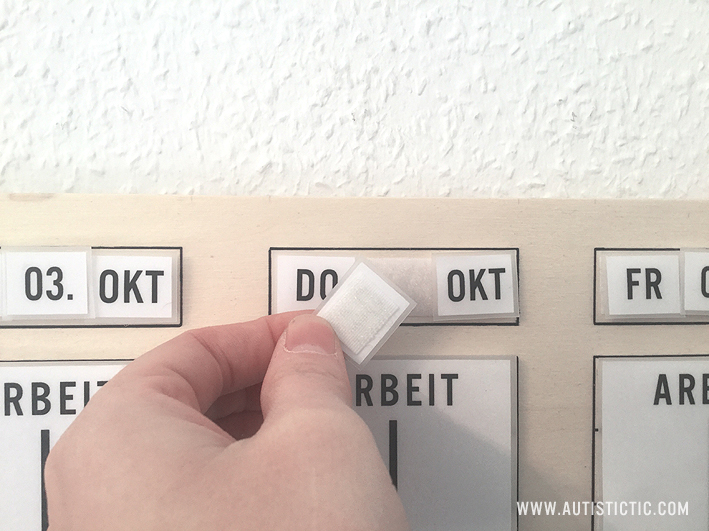 Velcro on every field means every element can be exchanged. This way I can adjust things without having to create an entirely new planner. For example, I can change the hours I plan in case my schedule changes.
A RING PLANNER TO ORGANIZE THE LABELS
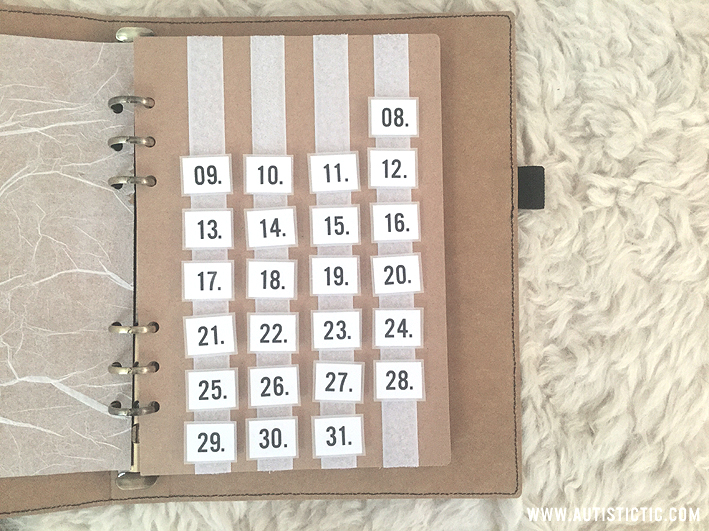 I still had this A5 sized ring planner I made and decided to use it to organize the labels for my planner. This way I can easily flip through and pick the ones I need. I had a box before but prefer this way because it takes away a lot less space.
LINES AND ARROWS FOR SCHEDULED DURATION – BRACKETS FOR BREAKS
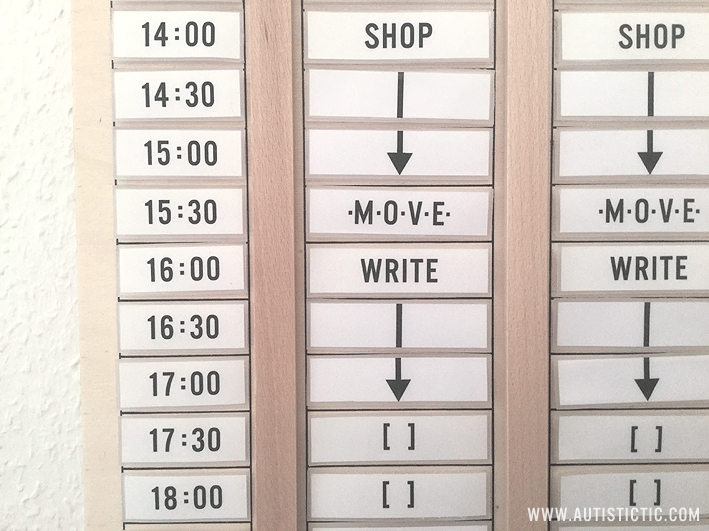
Generally there are things I need to do and things I want to do.
Need to do things are not flexible – like my getting up and going to sleep times, my morning and evening routine times, my break after work, any appointments, and my mealtimes.
Want to do things are flexible, so I can choose not to do them or do something else instead – like my writing, and working on my shop. This often becomes necessary due to my varying physical well-being and energy. I often have to rest instead of doing something I had planned. I do this with want to do tasks, not need to do tasks if possible.
CREATING THE PLANNER
Now for anyone who might be interested in how exactly this monstrosity came into existence I decided to write it all down. This should work as instruction if you want to make your own.
Here is what I used to create the planner:
FOR THE BOARD
– 1 wooden board 74 cm wide, 63.5 cm high, 6 mm thick
– 3 m of 1.5 cm wooden bars
– clear varnish
– 15 m of loop self-adhesive velcro
– waterproof marker
– pencil
– ruler
FOR THE LABELS
– a computer and printer
– a laminator and laminating foils
– a cutting mat, scalpel, and folding tool
– 10 m of hook self-adhesive velcro
TO HANG THE PLANNER UP
– 4 wall plugs
– 4 screws
– a drill
– a screw driver
– a level
– a vaccuum to clean up the dust
STEP BY STEP INSTRUCTIONS
1. Sketch the design.
2. Determine the measurements.
3. Get all your materials.
4. Sealed the board twice on both sides (to prevent warping) with clear matte varnish.
5. Mark guides for the grid in pencil.
6. Draw on the grid with a waterproof marker.
7. Cut all the pieces from the loop side of the velcro to attach to the board.
8. Tape the velcro to the board.
9. Type up your labels on a computer.
10. Print out your labels.
11. Cut out your labels.
12. Laminate your labels.
13. Cut out your labels again, leaving a 1 mm laminated border all around.
14. Cut all the pieces from the hook side of the velcro to attach to the labels.
15. Tape the velcro to the backs of your labels.
16. Build the sliding frame.
17. Put the frame onto the board.
18. Cut 4 small wooden pieces to put between board and wall to create space for the sliding frame.
19. Hang it all up.

Leave a Reply